As you already know, our React Native apps are using Firebase as the default backend. The app fetches and writes data from and to Firebase Firestore. Firestore is the database, containing several tables to structure all the data needed for the Booking app, such as users, vendors, professionals, categories, etc. In src/Configuration.js you can find the names of the data tables:
export const vendorsTableName = 'appointments_vendors'
export const vendorReviewsTableName = 'appointments_reviews'
export const vendorProductsTableName = 'users'
export const bookingsTableName = 'appointments_bookings'
export const vendorCategoriesTableName = 'appointments_categories'
Most data is populated automatically as your users are using the app, but you need to set up a couple of things first
1. Create Your Own Categories in Firestore
You need to build out the appointments_categories table. Simply add all your categories as a new entry in the collection. See the full structure below:
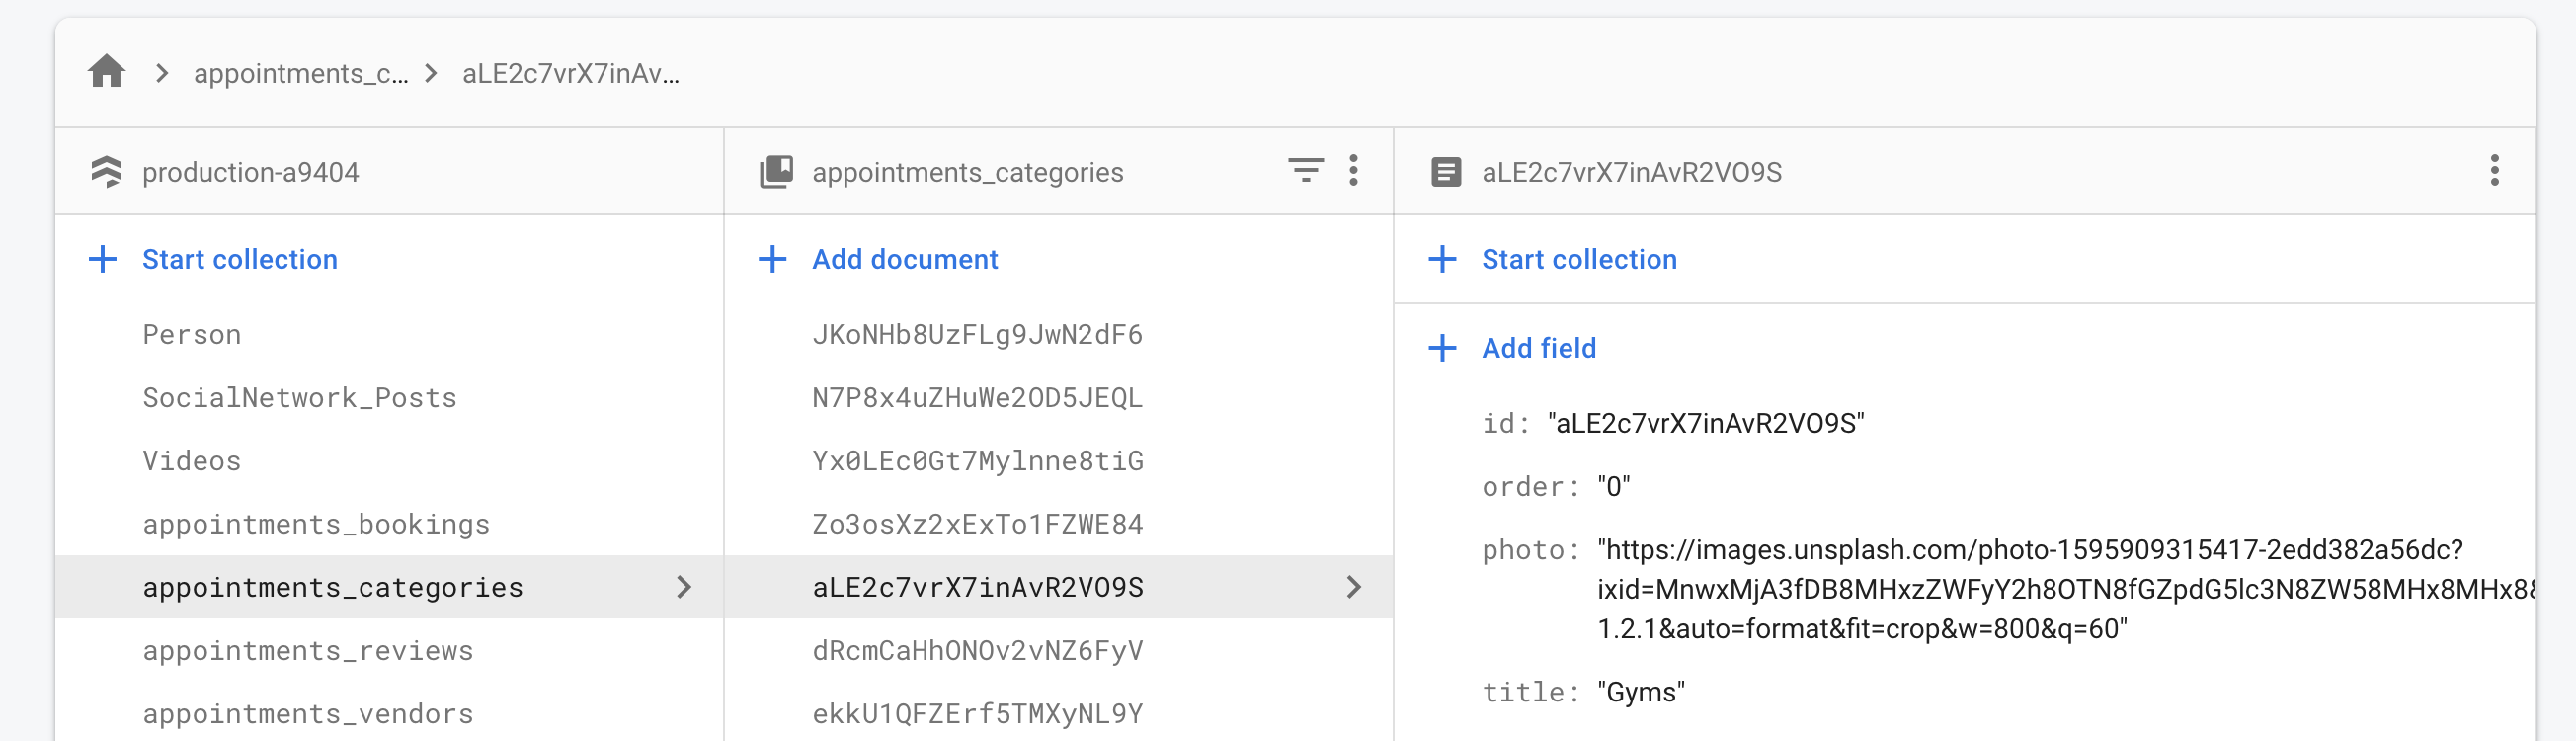
Make sure you specify the exact same fields: id, order, photo and title.
If you don’t want to create these categories manually, you can simply import the appointments_categories.json file, included in the DataSeed folder of the product. Follow this guide to learn how to import json data into your Firestore.
2. Add Your Vendors to Firestore
If you don’t want to use the app in multi-vendor mode, simply set the isMultiVendorEnabled flag to false in AppConfig.js and skip this step entirely.
If you are using the multi-vendor booking app (so you have multiple vendors, classified in multiple categories, such as multiple gyms and multiple salons, for example), you will need to add all these vendor data into Firestore, so that it can be displayed in the app. For example, you’ll need to add all the hair salons and all the gyms in Firestore.
The vendors data lives in appointments_vendors Firestore collection.
As before, you can add this data manually, or you can use the automatic import script for the appointments_vendors.json file in DataSeed folder, by following this guide.
Here’s the full structure of a vendor:
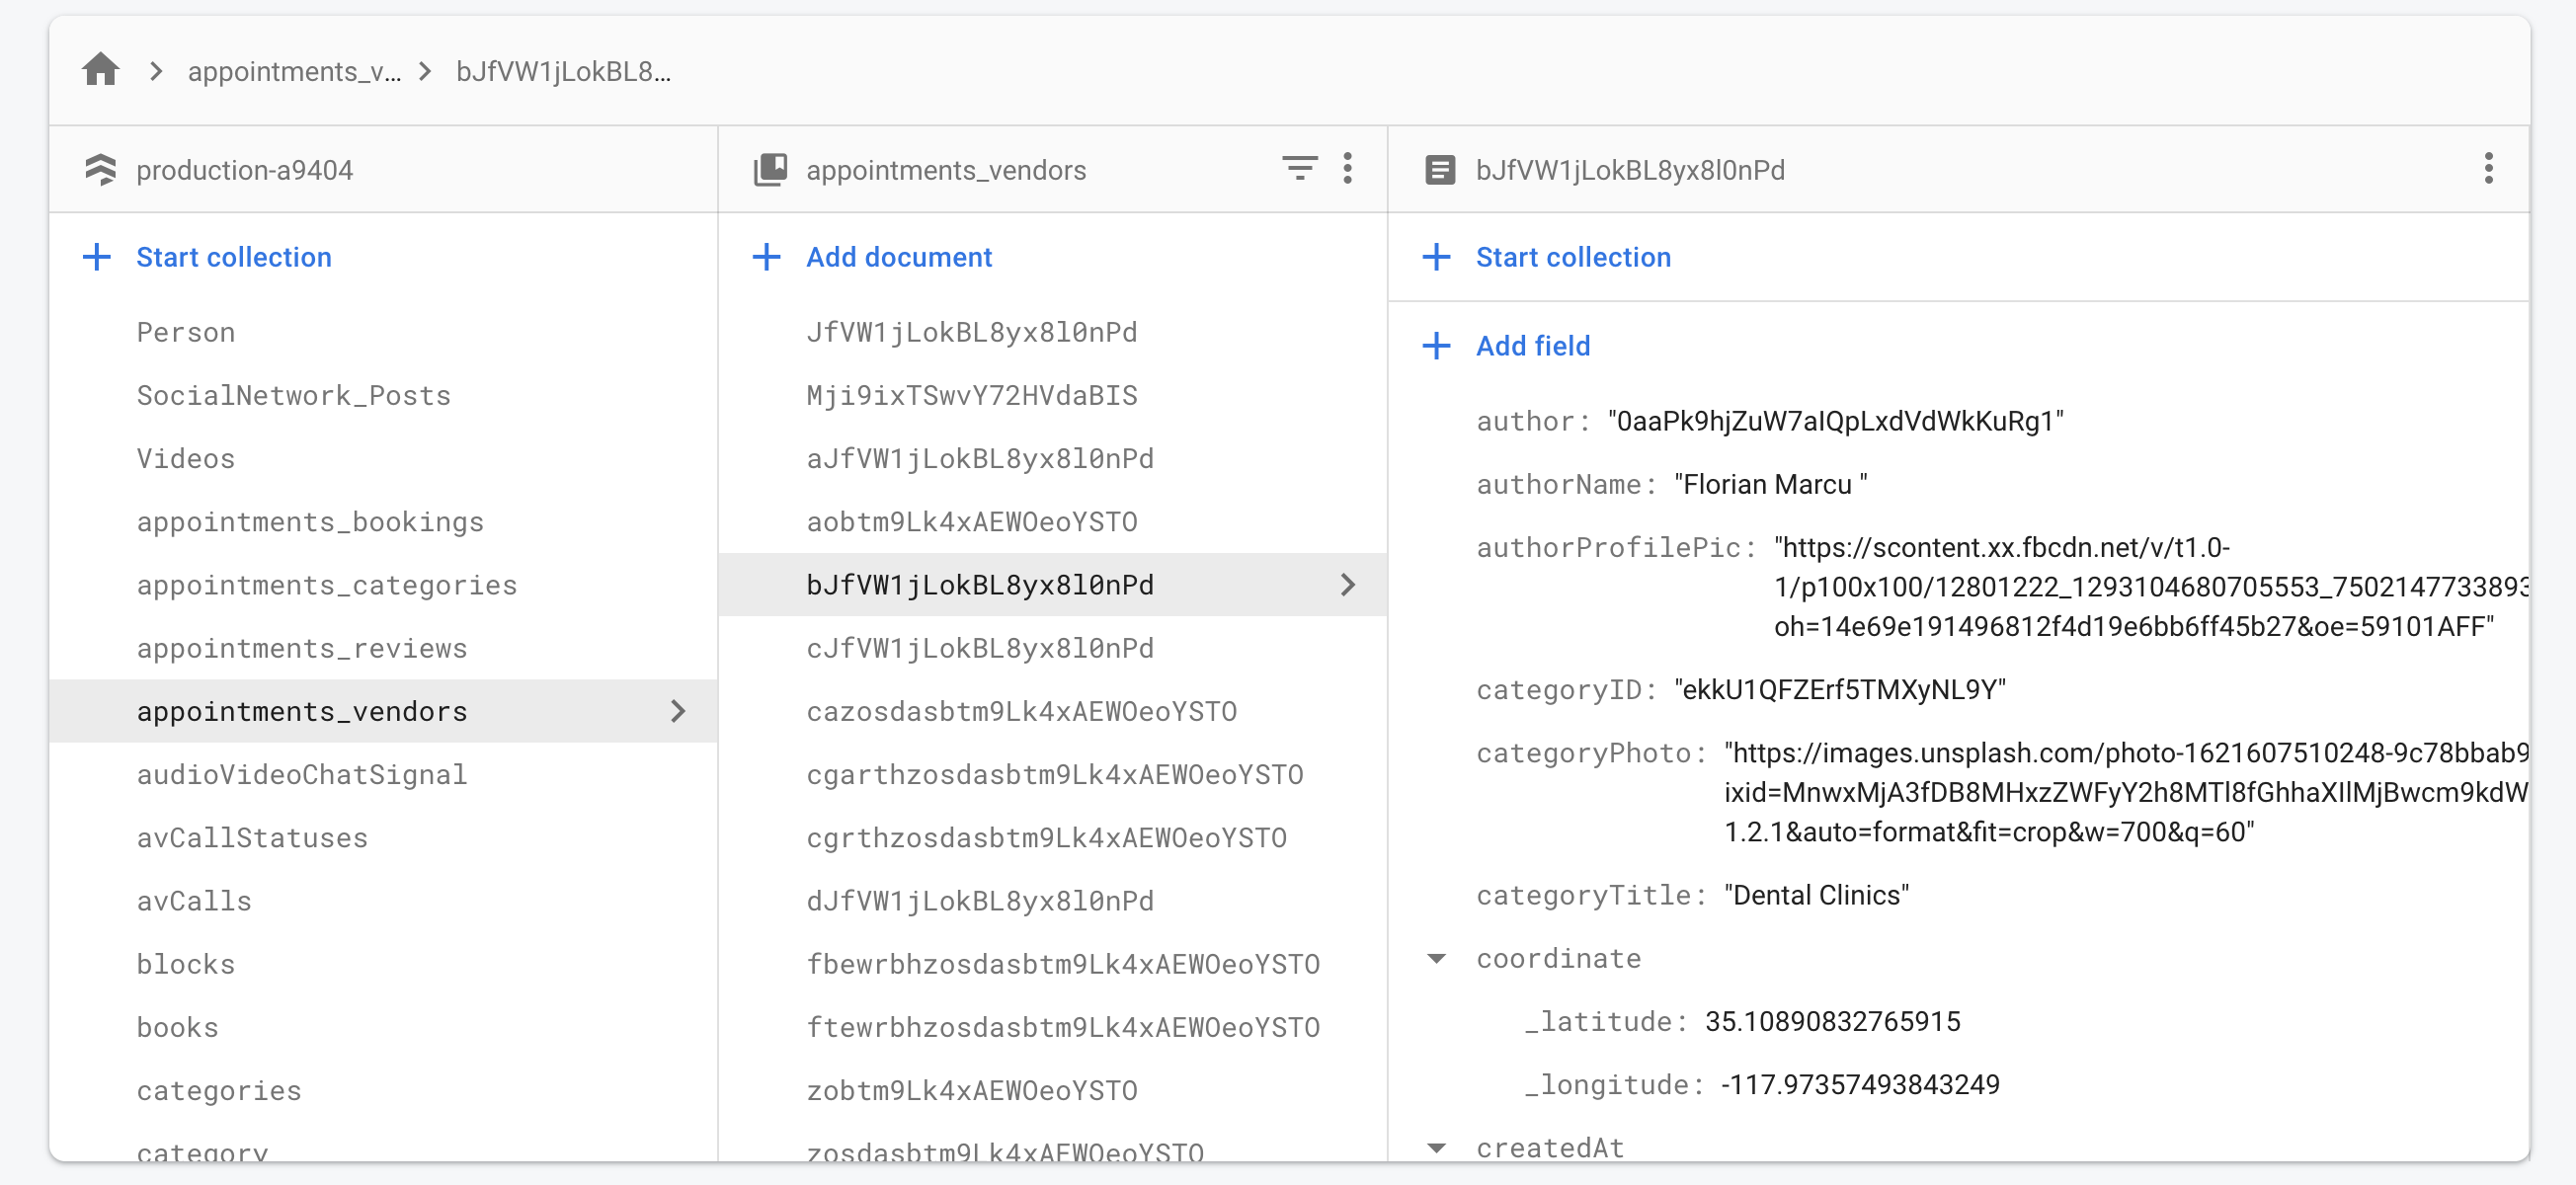

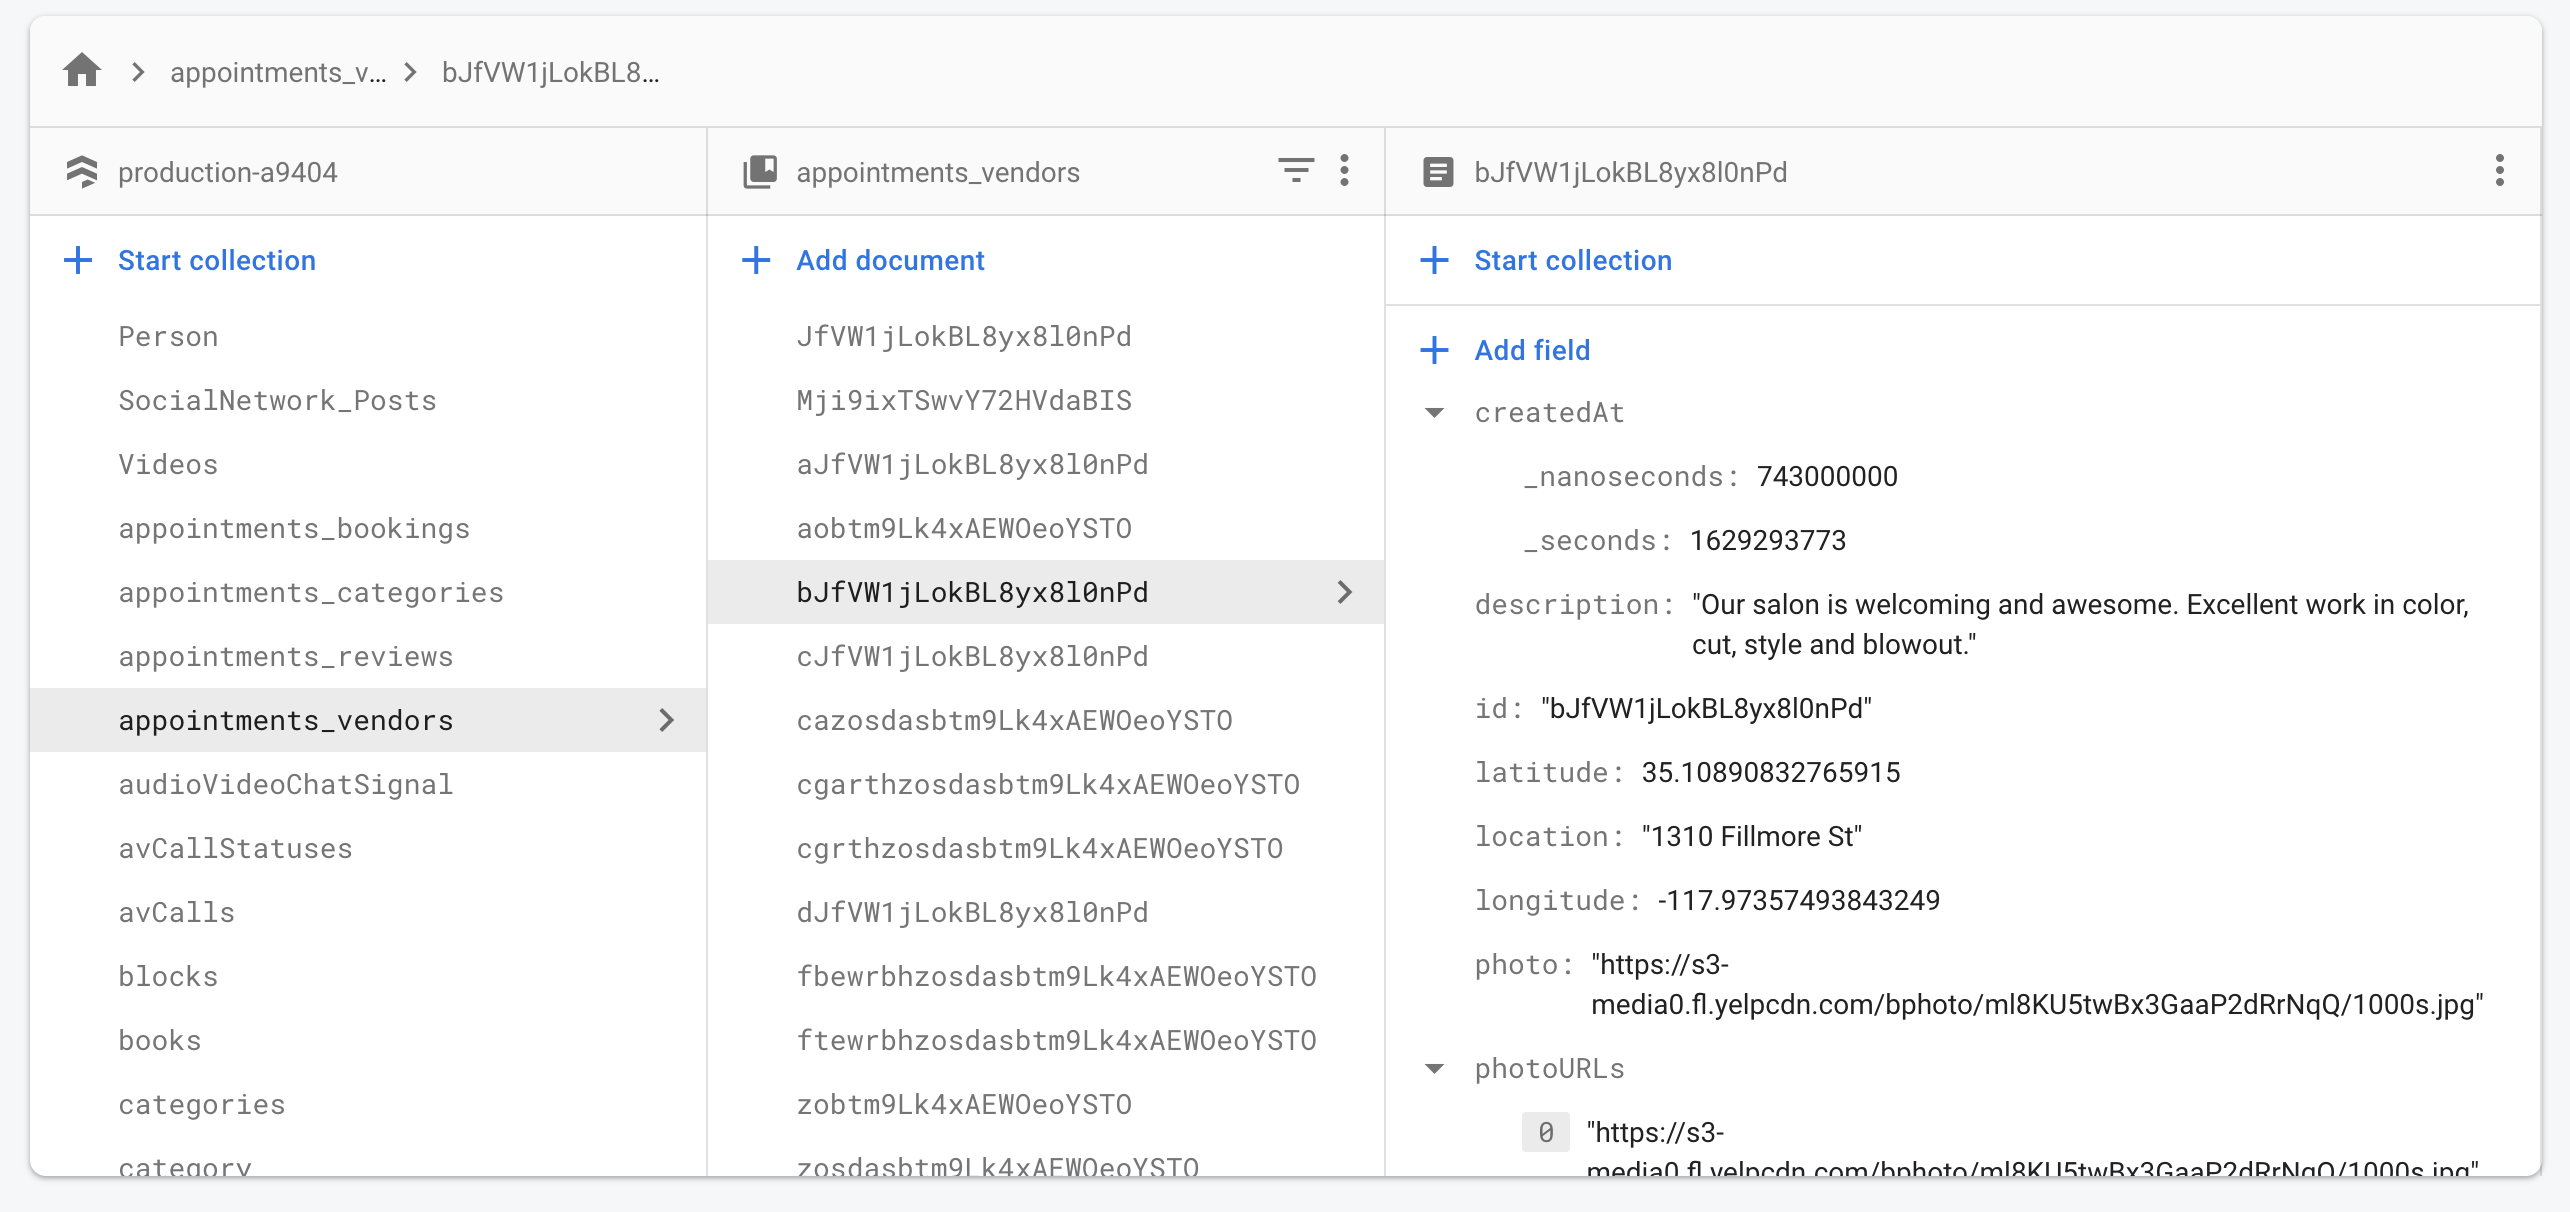
Most important fields are: id, photo, title, coordinate and categoryID.
3. Populate Data for Professionals
Now that categories and vendors are set up, you can start adding professionals to your app. Professionals are regular users, who can sign up, login and logout, so all their data gets stored into the same table as regular consumers: the users collection in Firestore.
Once a professional creates an account, it will show up automatically in the users collection. 1. Find the entry of the professional in the Firestore users collection
2. Set the role field to “professional“
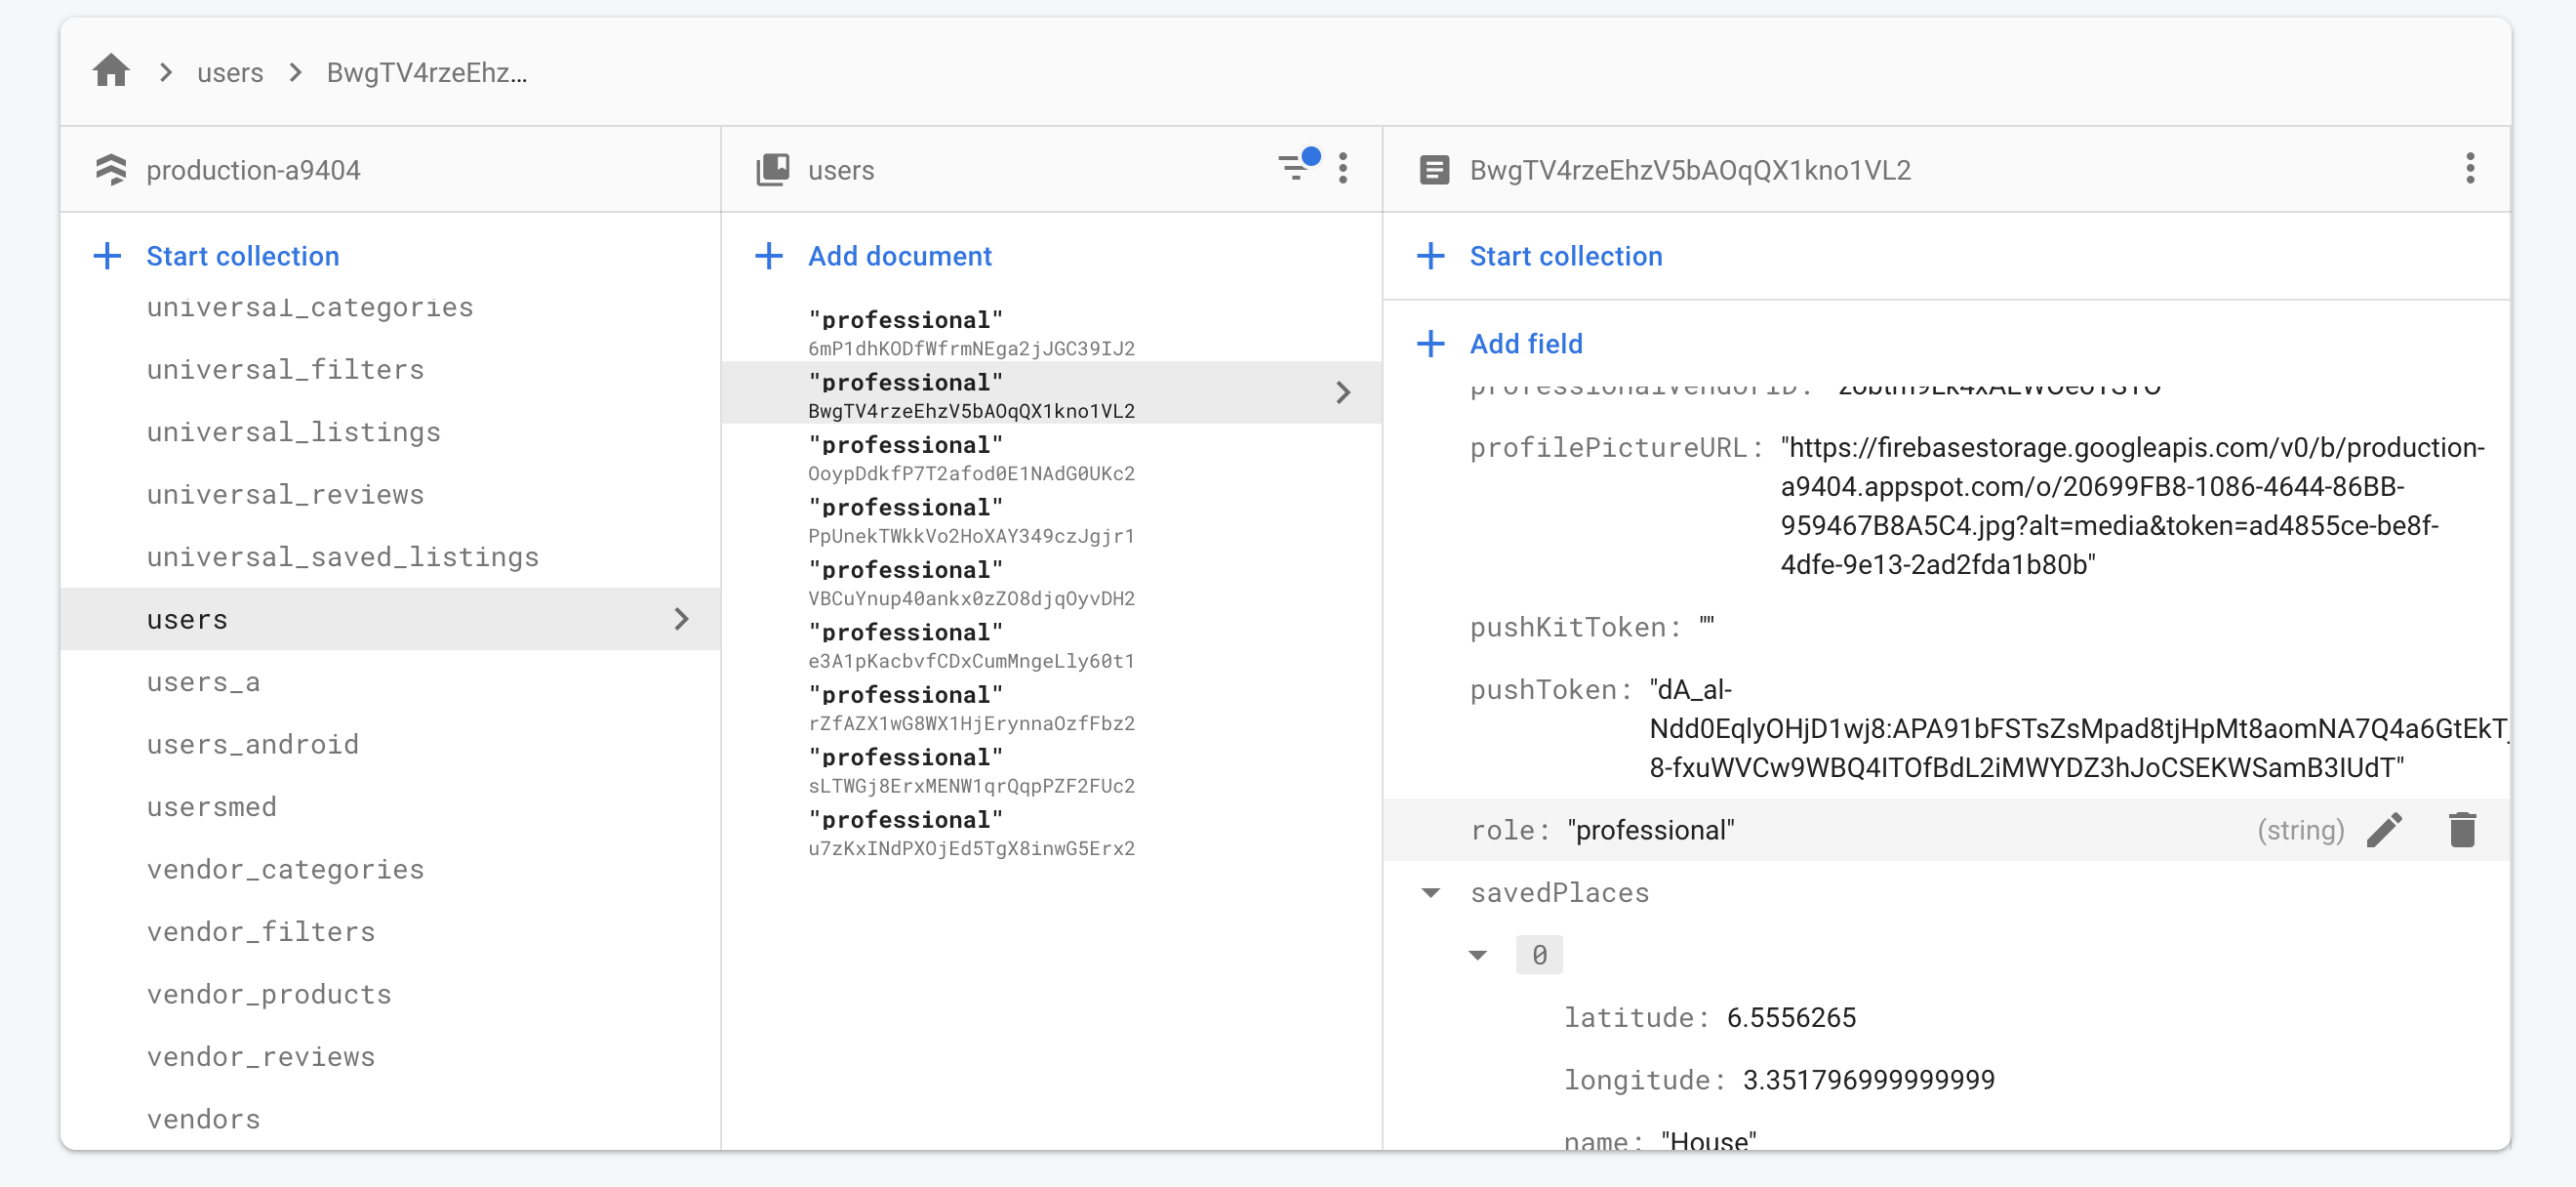
3.1 If you are using the app in multi-vendor mode, add the field professionalVendorID to the professional. This is the ID of the vendor where the professional operates. For example, for a doctor, this would be the vendor ID of the clinic where they work.
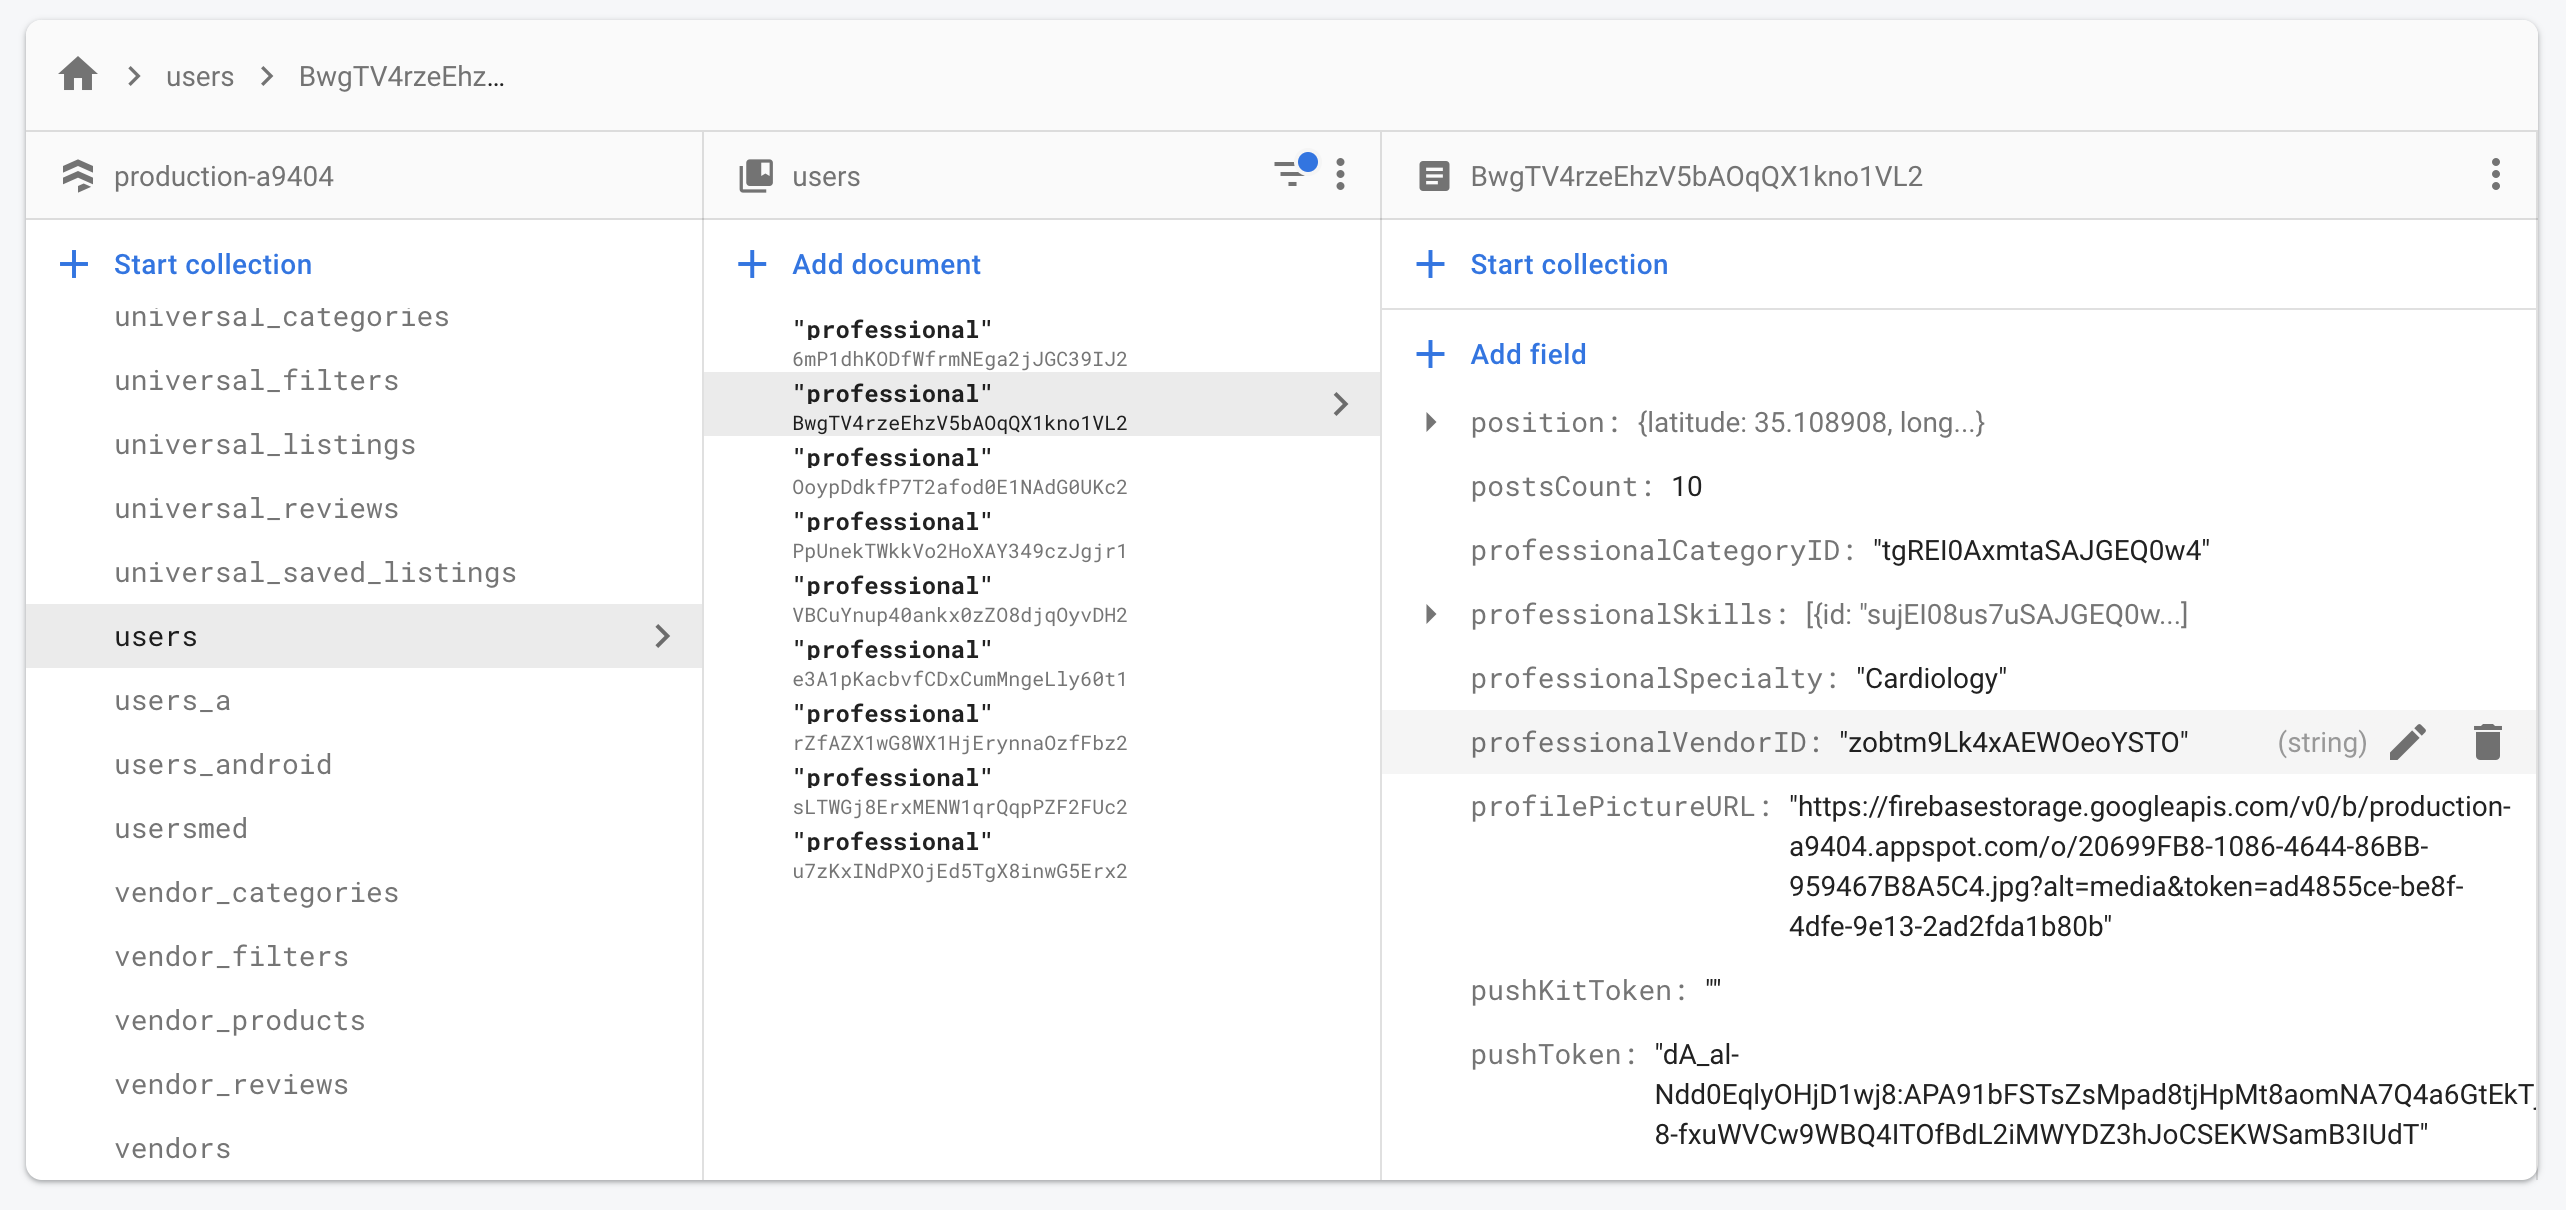
3.2 If you are using the app in single vendor mode, add the field professionalCategoryID to the professional entry. This would simply be the category ID of the category created above.
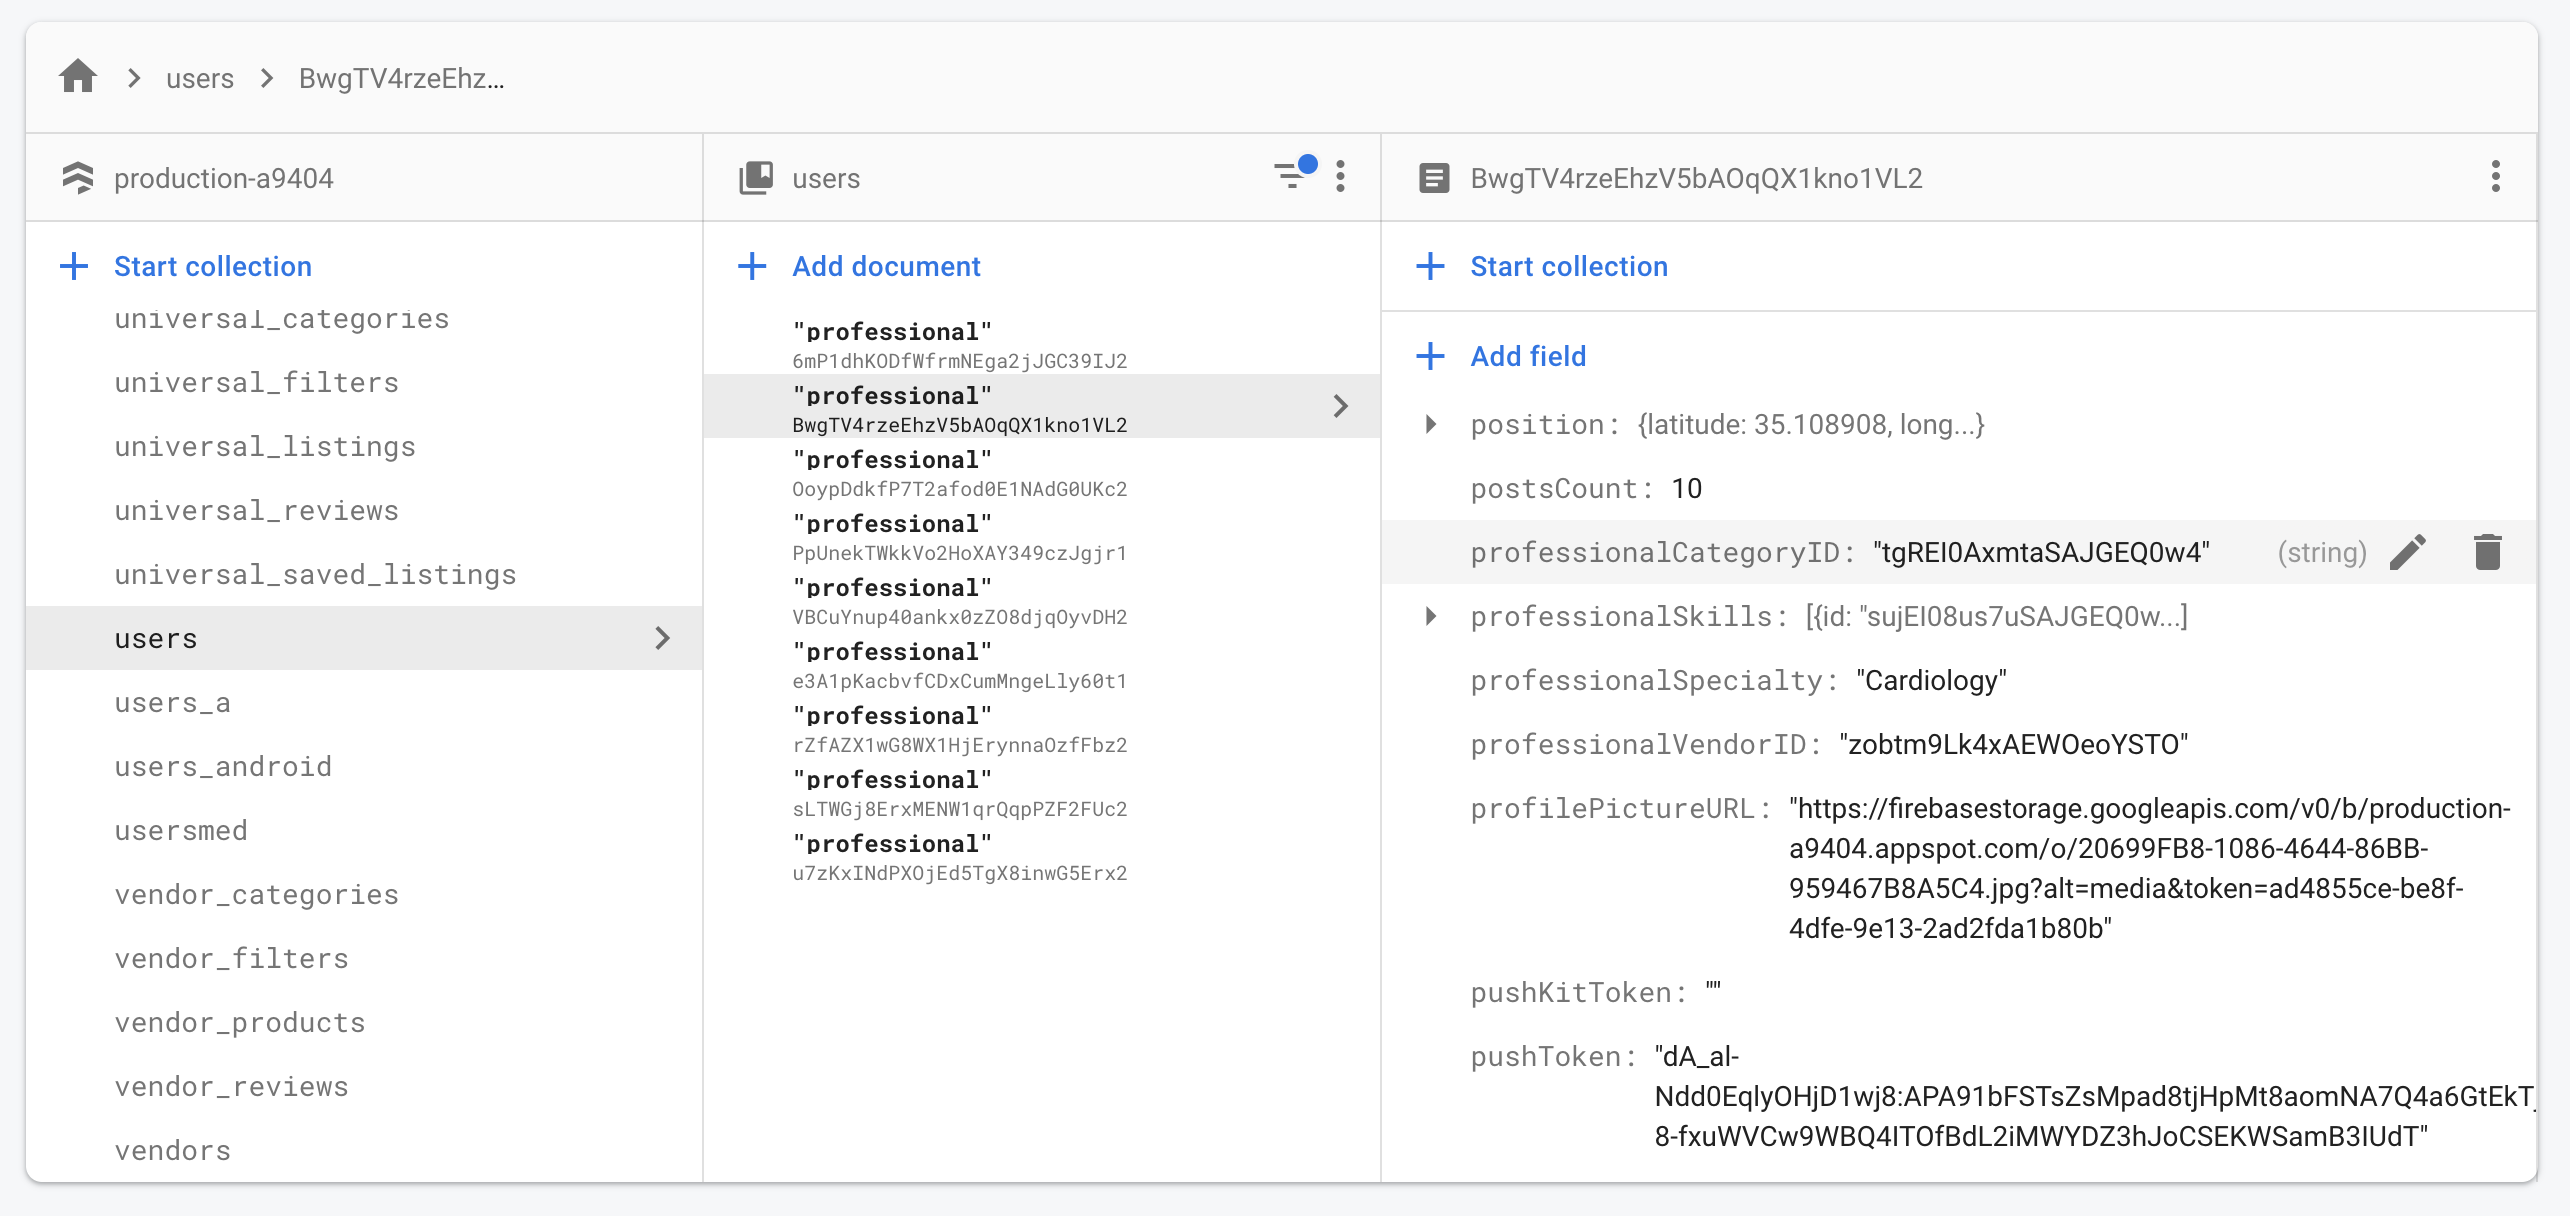
4. Add the field professionalSpecialty, representing the specialty of the current professional (e.g. Cardiology, Hair Cutting, etc.) – this shows up in the app, on the professional profile
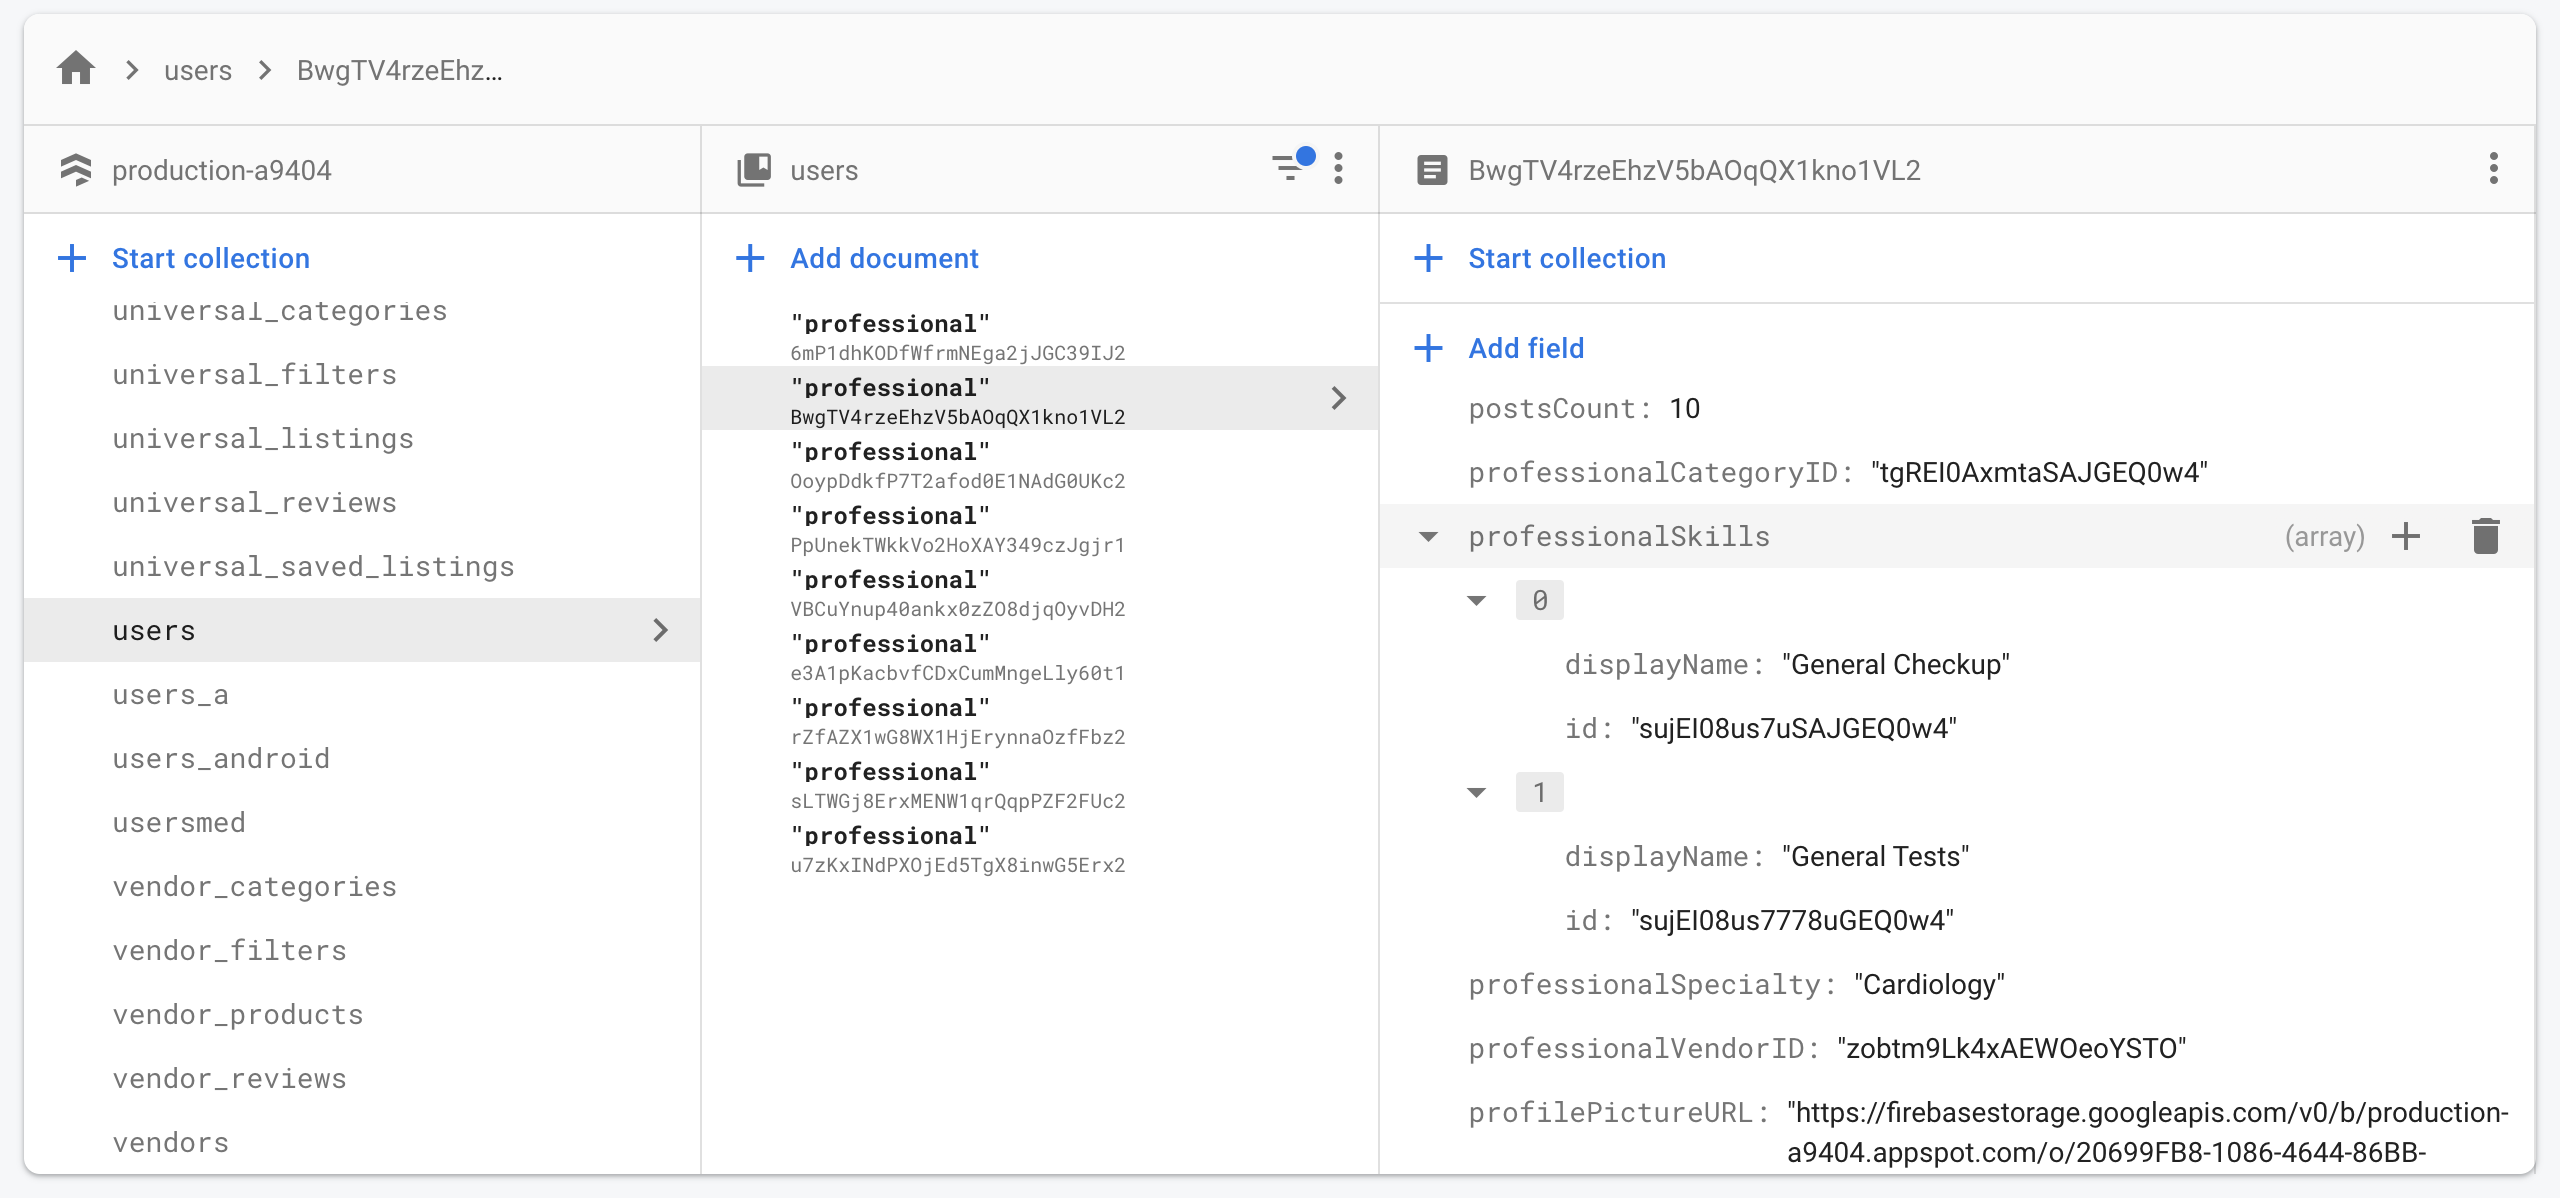
5. Add an array of professionalSkills. This is an array of map objects, where each object has a “displayName” field, and an “id” field. These skills show up on the professional profile in the app, and users can make appointments choosing the skill for which they want to see the professional (e.g. an appointment to a hair stylist, with a skill for “Coloring”)
Now that you added the categories, the vendors, and completed the profiles for professionals, your app should be ready to use.
Simply log in as regular user, and start making appointments to various professionals, to get. a feeling of how all this data is related to the app UI.
4. Log In As a Professional
Try to log in as a professional user. That is a user that has the “role” field set to “professional”. You will be able to see that the UX is different – it contains the app for managing appointments, such as canceling, confirming, adding notes, etc.
This is all you need to do to log in as a professional.
You can launch this as a separate app. All you need to do, is copy paste the entire codebase, and change the Bundle ID / appID of the project to unique names.