In order to complete the set up of your Taxi app, and successfully request a ride, you will need to:
- Update Firestore(Firebase Console) database with Taxi car categories.
- Ensure you have at least a driver signed-up on your driver app.
After completing this, you will be able to succesfully request a trip on your Taxi app.
Update Firestore database with Taxi car categories.
Since you want a user to choose from different car categories while requesting for a ride, you need to add these car categories to your Firestore database in your Firebase Console.
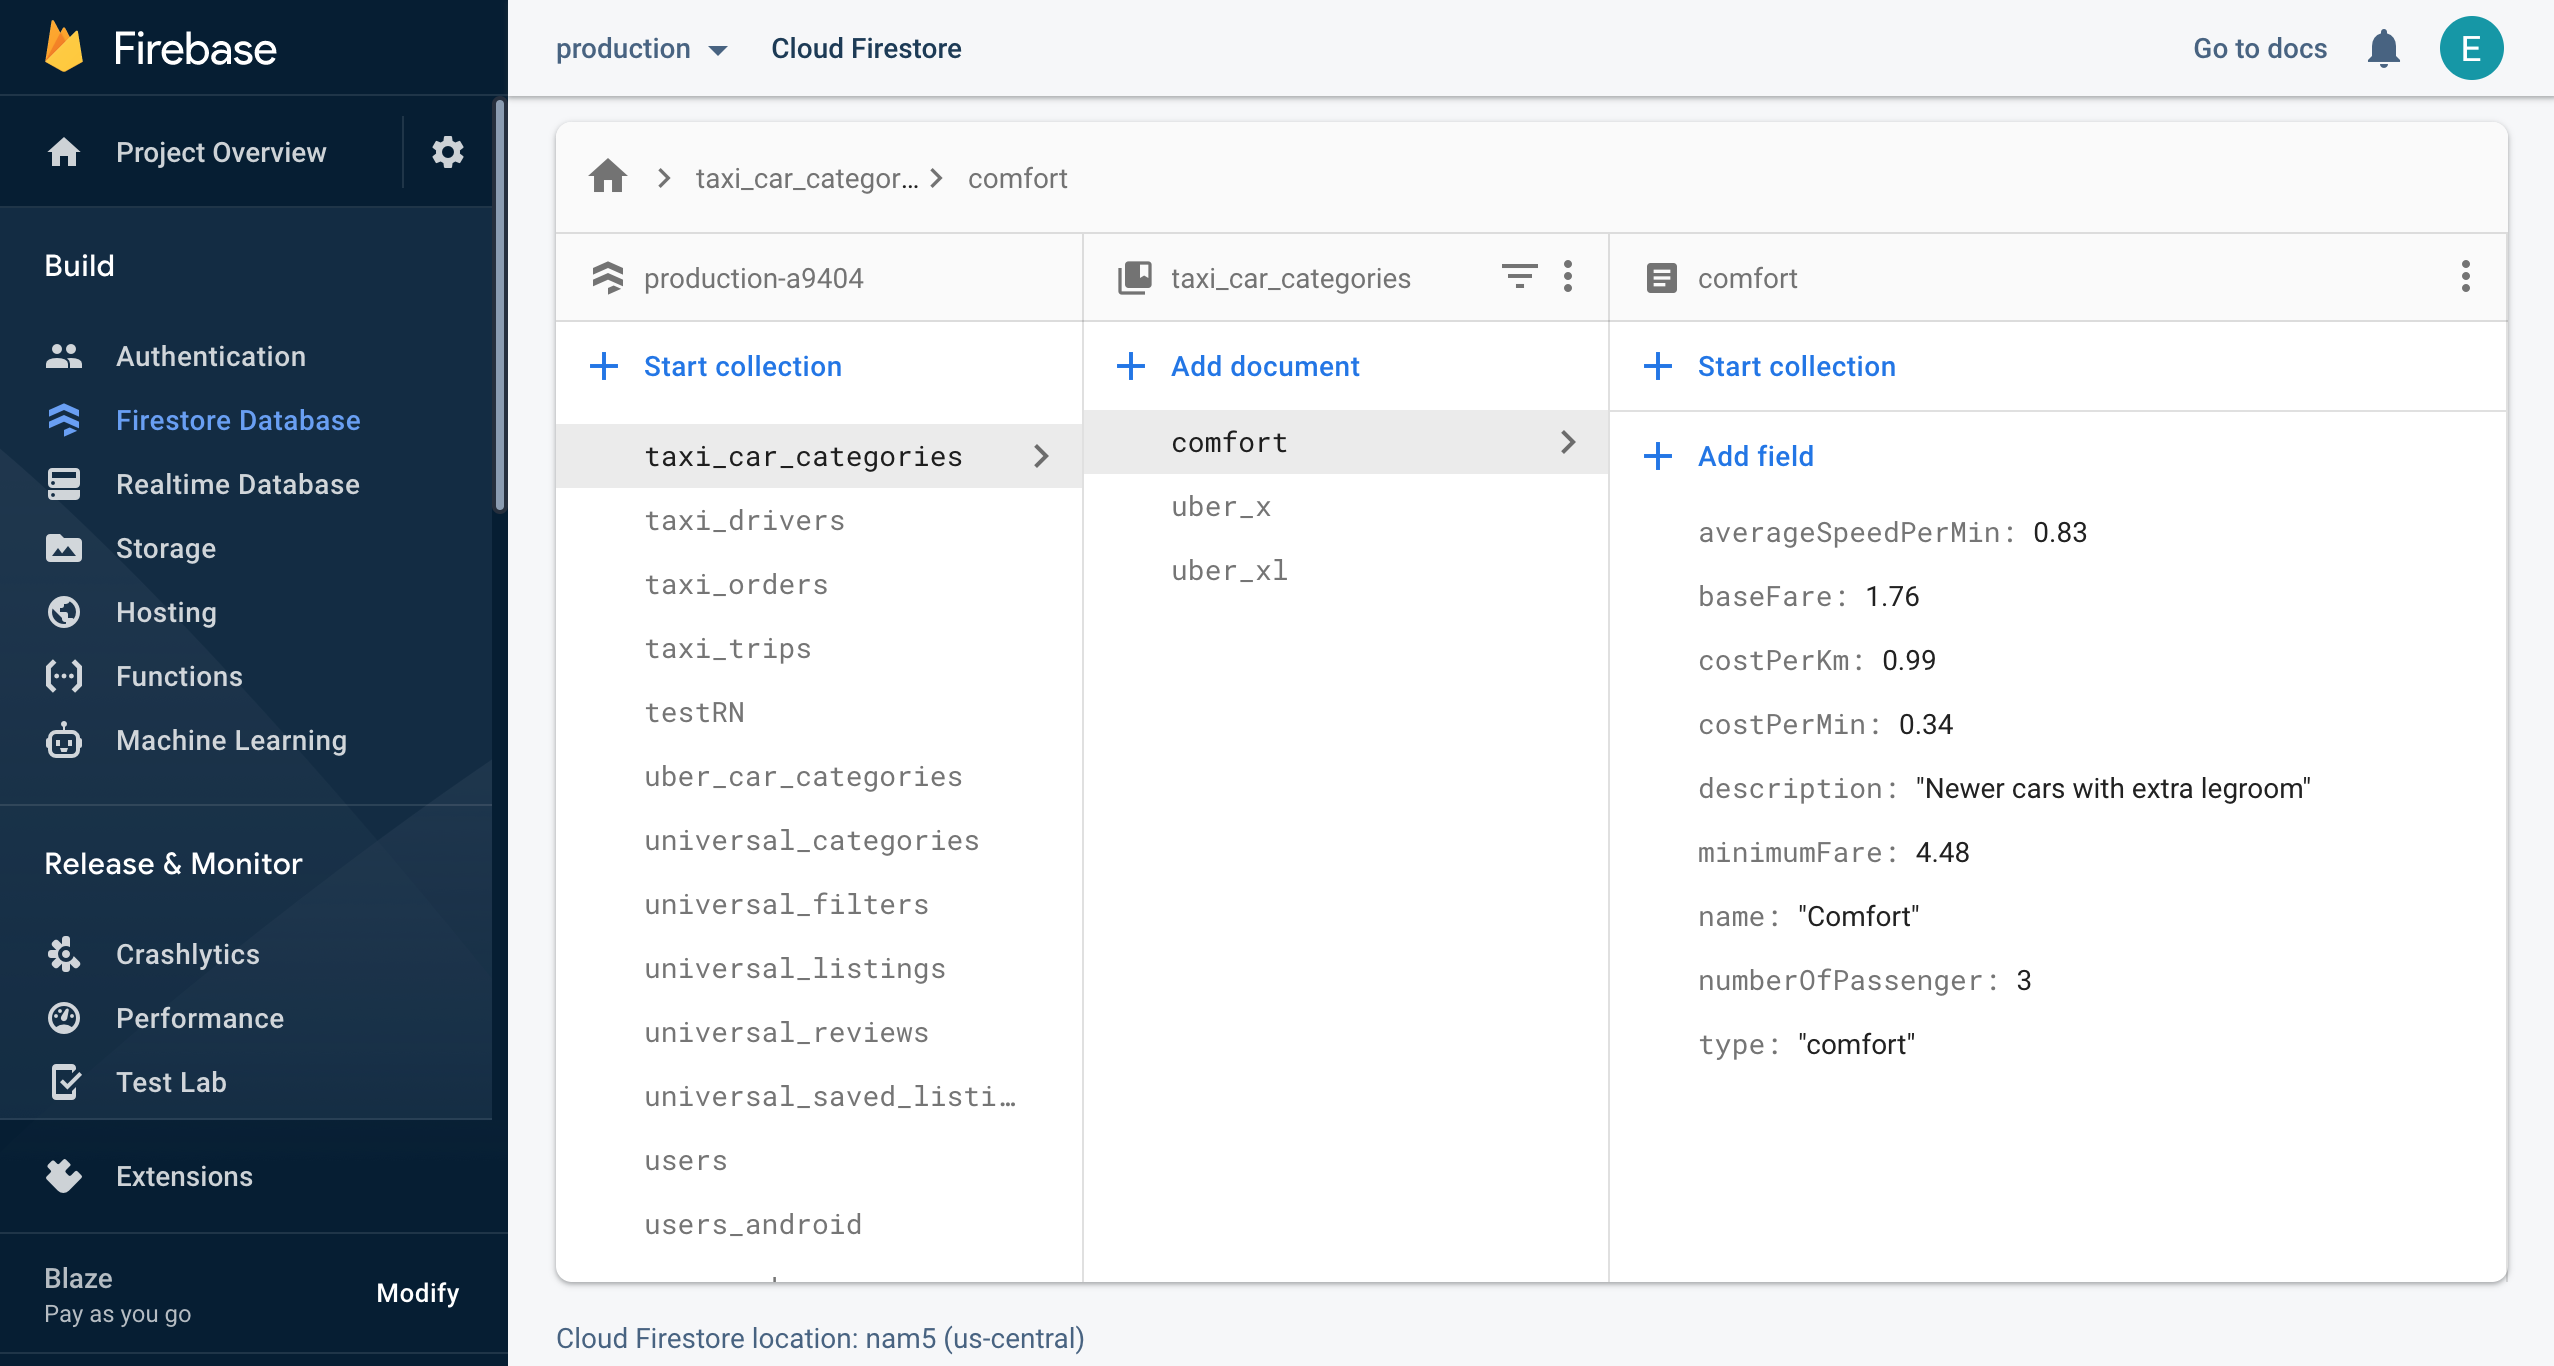
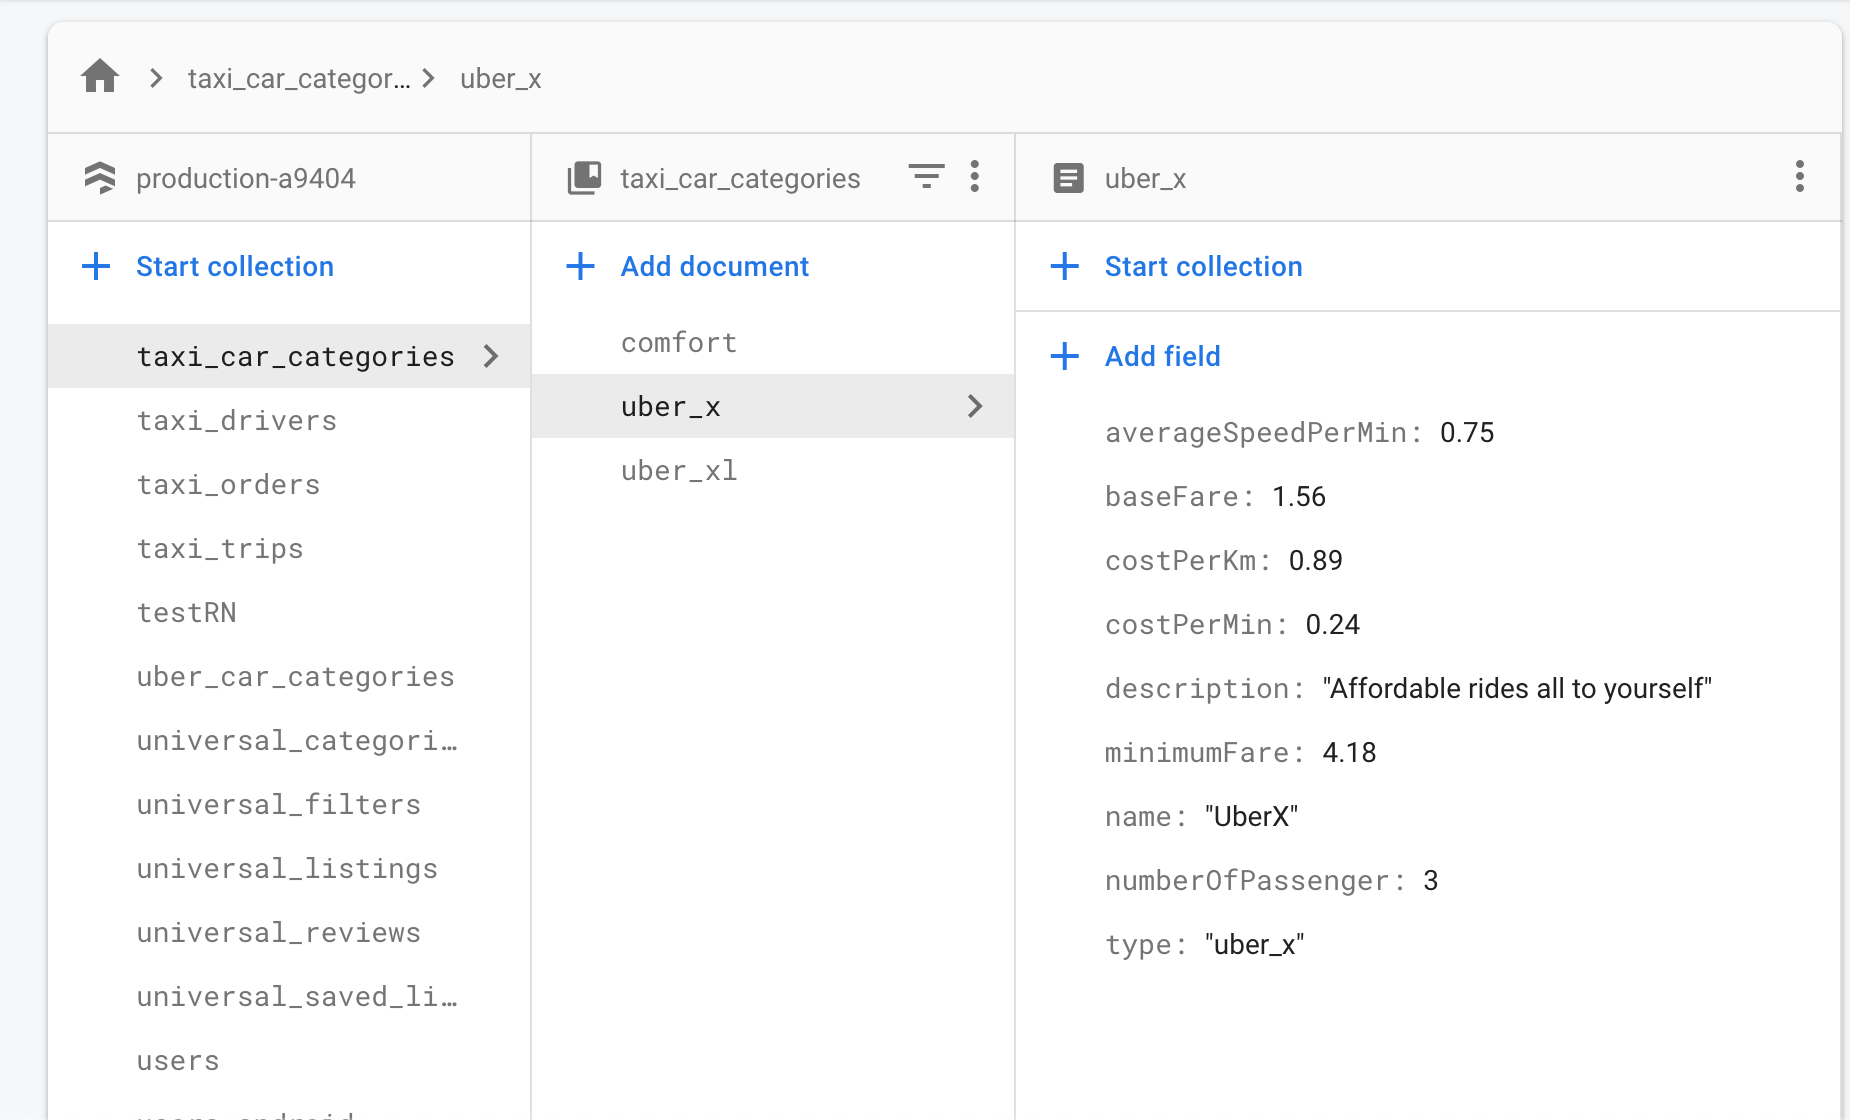
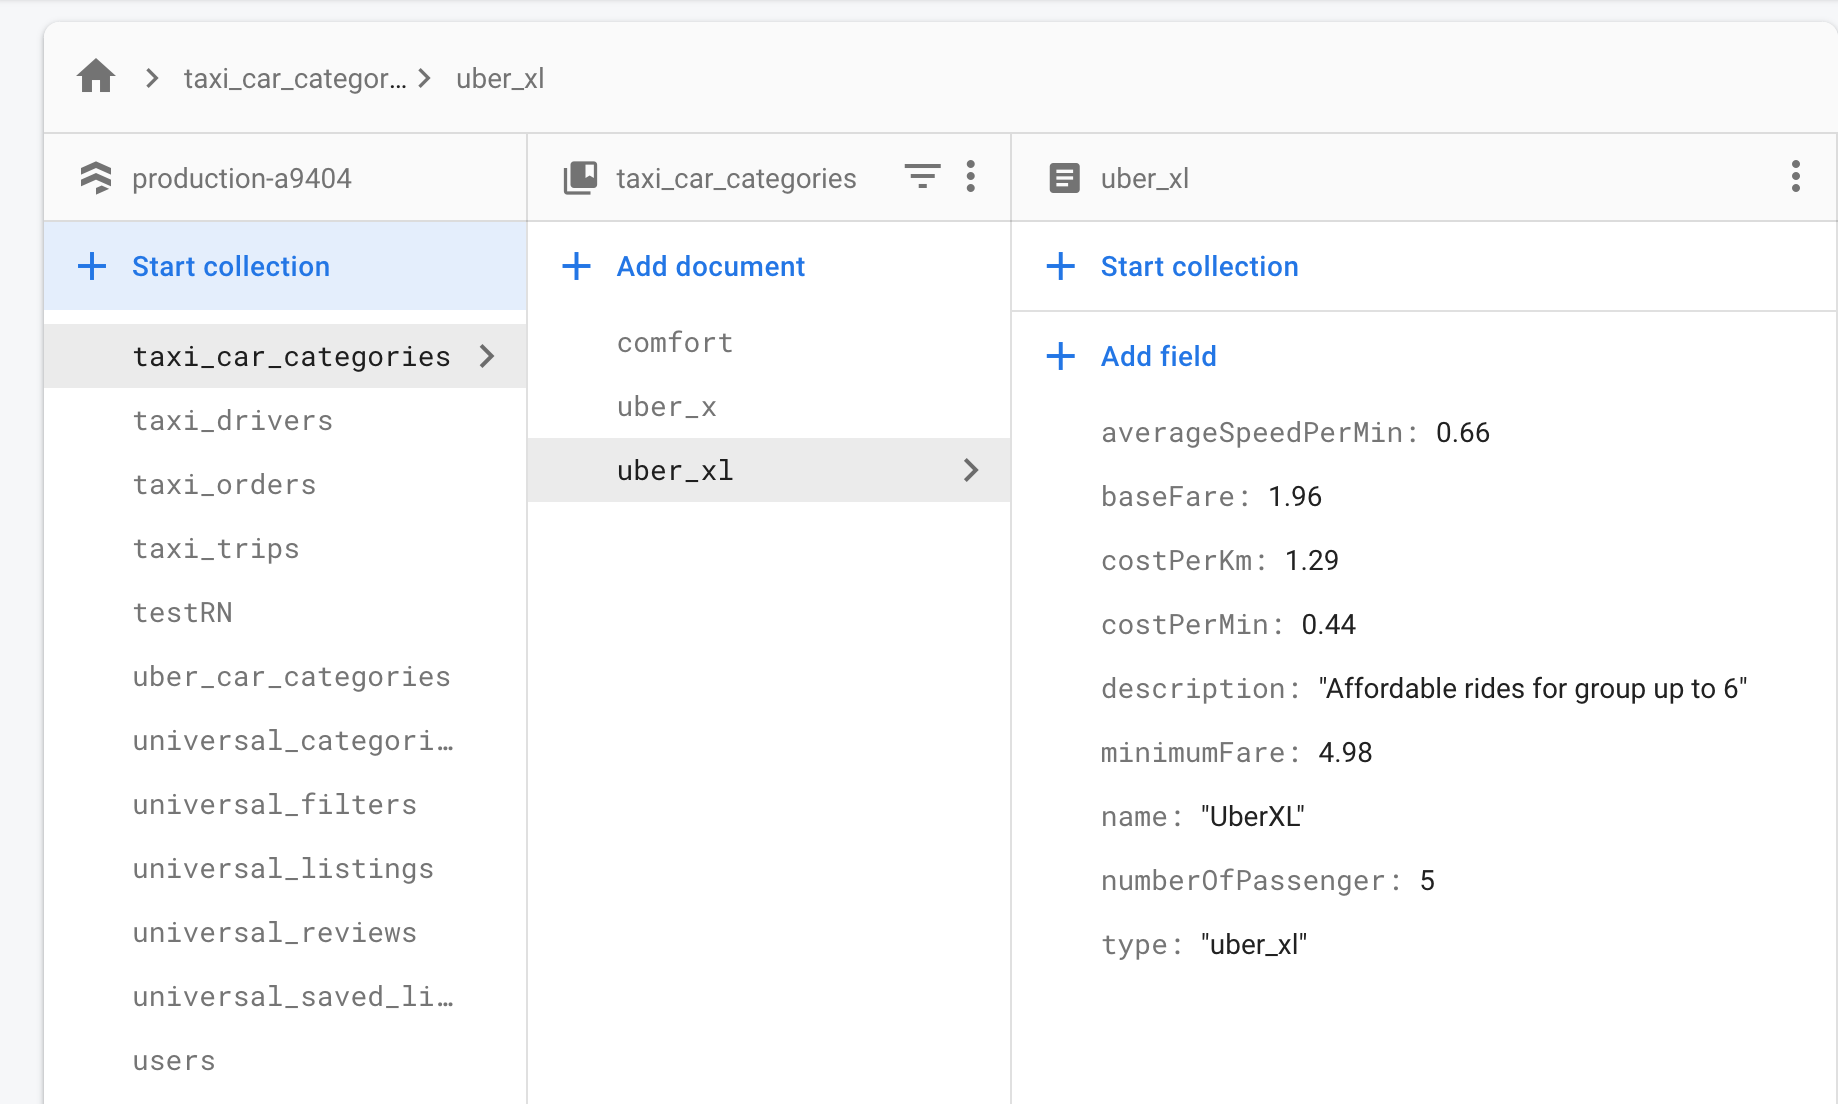
You should start by creating a collection called – taxi_car_categories
The name should be exactly “”taxi_car_categories” as this is important in order not to break ur app.
If you will like to use a different collection name, you should also go the source code and locate the file in the path “src/api/firebase/trips.js”, on line 4, change “taxi_car_categories” to your new collection name.
Use the images below to update your Firestore console accordingly.
Ensure you have at least a driver signed-up on your driver app
Since drivers are a special type of users, you’ll need to do some customizations every time you add a new driver to your fleet. To do this, follow the next steps:
- Have the driver create a new account in the app
- In Firestore (Firebase Console), find the account in the “users” table (you can filter by e-mail address to make it easier) and add the next additional fields to this entry (all of them of type string):
- role: “driver“
- inProgressOrderID: null
- carNumber – the license plate (e.g. 7WFXAS)
- carName – the name of the car model (e.g. Tesla S)
-
carPictureURL – the URL of the car photo (e.g. https://instamobile.io/tesla.png)
Once done, the new driver will be able to log into the driver app, and start accepting delivery orders.