An App Walkthrough Screen is a slider screen which allows the user to learn everything about the features of a mobile app when they open the application for the first time. We can implement this feature in a React Native application in multiple ways. In this React Native tutorial, we describe how we implemented the Walkthrough Screens in all of our React Native Templates so that you can speed up your app development by reusing our open source code.
In this tutorial, we will make use of react-native-app-intro-slider package to implement the app walkthrough screens. react-native-app-intro-slider is a simple and configurable app introduction slider written for React Native projects. It helps developers implement an easy-to-use, yet very configurable app introduction slider/swiper based on FlatList. Therefore, we are using this package to implement our walkthrough screens.
Firstly, let’s look at the following steps that we need to perform to build this app:
- Installing react-native-app-intro-slider npm package
- Importing the package into the JavaScript code
- Creating a state for handling the visible status
- Creating two simple functions for handling the slide visible state
- Deciding whether to show the walkthrough screens or main app
- Adding mock data for the feed package
- Building the stylesheet for a better design & UX
Now, let’s implement these steps to get our final product, which will look and behave exactly like in the animation below:

1. Install react-native-app-intro-slider package
In this step, we need to install the react-native-app-intro-slider in our project. To do this, you can execute the following code on your NPM or command prompt: Using NPM or command prompt :
npm install react-native-app-intro-slider --save
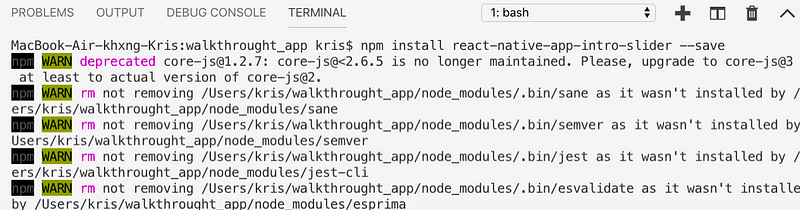
As a result, you can see all the modules it downloads into our project in the above screenshot. These packages are stored in node_modules directory of our project, which you are already familiar with, if you’ve ever done React Native before.
2. Import the Package to App.js
In this step, you need to import our newly installed react-native-app-intro-slider package to our App.js file. Here, we import the package as AppIntroSlider as shown in the code snippet below:
import AppIntroSlider from 'react-native-app-intro-slider';
Therefore, the package react-native-app-intro-slider will be imported to your App.js file. Now, you can use its various modules and methods.
3. Handle Walkthrough Visibility Status with State
In this step, we need to create a state to handle the walkthrough visibility status, by checking whether it is visible or not in the app interface. Thus, we create a variable named show_Main_App to store the Boolean value for our state handler. You can do this using the following React Native code snippet:
constructor(props) {
    super(props);
    this.state = {
        show_Main_App: false
    };
}
4. Toggling the Visibility State with Two Functions
Creating a state is not enough, we need a mechanism to toggle the visibility status of the walkthrough screens as well. Thus, in order to handle the state values we need to create two simple functions. These handler functions are shown in the code snippet below:
on_Done_all_slides = () => {
    this.setState({ show_Main_App: true });
  };
on_Skip_slides = () => {
    this.setState({ show_Main_App: true });
  };
As a result, the above two functions on_Done_all_slides() and on_Skip_slides = () will enable the program to handle the state show_Main_App and set it as true.
5. Displaying the Walkthrough Screens and the Main App
In this step, we initialize a simple condition to make our walkthrough visible in the app’s user interface. In order to achieve this, we need to make use of the render() function which will return a template <View> to the main app interface if the condition of our state show_Main_App is true, otherwise, it will return AppIntroSlider module to our app interface to display the actual walkthrough screens. You can make use of following code snippet for this operation:
render() {
    if (this.state.show_Main_App) {
      return (
        <View style={styles.MainContainer}>
          <Text style={{ textAlign: 'center', fontSize: 20, color: '#000' }}>
              This is your main App screen After App Walkthrough.
          <Text>
      );
   } else {
       return (
         <AppIntroSlider slides={slides} onDone={this.on_Done_all_slides}
          showSkipButton={true}
          onSkip={this.on_Skip_slides} />
        );
   }
}
As a result, using the above code you can set up a condition to decide whether to show the walkthrough screen or the main app. Most importantly, make sure that you configure your project with the exact same configurations shown in the above code snippet.
6. Adding Mock Data to the React Native Walkthrough Screens
In this step, we will add some mock data to our React Native Walkthrough Screens, that are built on top of AppIntroSlider package. We are using the following dataset with a slides list that contains key, title, text, image, etc. You can use your own dataset but keep in mind that every key should be a unique value. Here’s a React Native example on how to achieve this:
const slides = [
  {
    key: 'k1',
    title: 'Ecommerce Leader',
    text: 'Best ecommerce in the world',
    image: {
      uri:
        'https://i.imgur.com/jr6pfzM.png',
    },
    titleStyle: styles.title,
    textStyle: styles.text,
    imageStyle: styles.image,
    backgroundColor: '#F7BB64',
  },
  {
    key: 'k2',
    title: 'fast delivery',
    text: 'get your order insantly fast',
    image: {
      uri:
        'https://i.imgur.com/au4H7Vt.png',
    },
    titleStyle: styles.title,
    textStyle: styles.text,
    imageStyle: styles.image,
    backgroundColor: '#F4B1BA',
  },
  {
    key: 'k3',
    title: 'many store ',
    text: 'Multiple store location',
    image: {
      uri: 'https://i.imgur.com/bXgn893.png',
    },
    titleStyle: styles.title,
    textStyle: styles.text,
    imageStyle: styles.image,
    backgroundColor: '#4093D2',
  },
  {
    key: 'k4',
    title: '24 hours suport',
    text: ' Get Support 24 Hours with Real Human',
    image: {
      uri: 'https://i.imgur.com/mFKL47j.png',
    },
    titleStyle: styles.title,
    textStyle: styles.text,
    imageStyle: styles.image,
    backgroundColor: '#644EE2',
  }
];
The meaning of each keyword in the above code snippet is explained below:
- key: The key should be unique for each slide.
- title: It represents the title of the slide.
- text: It represents the description text of the swipe page.
- image: You need to pass the image path of the slide here.
- titleStyle: You will use this to call the title style.
- textStyle : You will use this to style the description text.
- imageStyles: You will use this to call the image style.
- backgroundColor : Using this, you will define background color in HEX color code format.
7. Styling the UI & UX Components
Finally, in this step, we need to add some styles to our walkthrough screens, to customize the app design of the new user flow. Let’s go ahead and add the following CSS stylesheet to your app:
const styles = StyleSheet.create({
   MainContainer: {
    flex: 1,
    paddingTop: 20,
    alignItems: 'center',
    justifyContent: 'center',
    padding: 20
   },

   title: {
    fontSize: 26,
    color: '#fff',
    fontWeight: 'bold',
    textAlign: 'center',
    marginTop: 20,
   },

   text: {
    color: '#fff',
    fontSize: 20,
   },

   image: {
    width: 200,
    height: 200,
    resizeMode: 'contain'
   }
});
Note: You can use any CSS styling to your application. It will not affect the overall functioning of the application. Run the React Native project you’ve just finished, and you should see the completed creation of a Walkthrough Flow in React Native.
Summary
We can use a number of ways to build a walkthrough flow app in React-Native but using a 3rd party npm package is comparatively simple and quick. Following these seven steps will help you configure your walkthrough app in react-native using react-native-app-intro-slider package. You can also find and study lots of other configurations using this package. So, let your imagination and knowledge flow. Finally, by following the steps mentioned in this tutorial, you will be able to create a simple app walkthrough to guide new users through your new application in React-Native. If you want to build an advanced Walkthrough App template with an unlimited number of walkthrough steps, extensible code and modularized colors, strings, and images, check out a free walkthrough React Native template from Instamobile.io.
Next Steps
Now that you have learned about resources to learn React Native development, here are some other topics you can look into
- Firebase — Push notifications | Firebase storage
- How To in React Native — WebView | Gradient| Camera| Adding GIF| Google Maps | Redux | Debugging | Hooks| Dark mode | Deep-link | GraphQL | AsyncStorage | Offline |Chart | Walkthrough | Geolocation | Tinder swipe | App icon | REST API
- Payments — Apple Pay | Stripe
- Authentication — Google Login| Facebook login | Phone Auth |
- Best Resource – App idea | Podcast | Newsletter| App template
If you need a base to start your next React Native app, you can make your next awesome app using many React Native template.